
 I started painting on rice paper years ago. Gradually I began to illustrate familiar stories on the rice paper. I glued wooden dowels to both ends to make handling the delicate paper easier. I shared these scrolls with my students as I told them stories, then had them repeat the stories using my illustrations to remind them of important plot elements as they spoke.
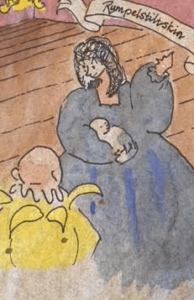
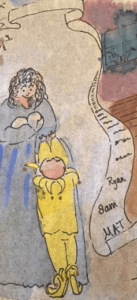 When sharing a story scroll, I hold one dowel in each hand, then I roll the rice paper to show the story scene by scene as I tell it outloud. After telling the story, I have to remember to rewind the scroll! Each scroll is tied closed with a ribbon. My scrolls are stored in decorated cardboard tubes and elegant
wrapped or fabric covered boxes.
 Eventually, I started helping students in my classes create their own story scrolls. Kindergarteners have just as much fun making and sharing the scrolls as older students. I love using story scrolls in class because even with the same, detailed directions, there is an explosion of individuality in the project – no two are ever alike. Usually, I start by having students retell familiar fairy tales, myths, tall tales, or legends. Then if they want to make another scroll, they could also create their own story.
 I start by demonstrating the process of painting the background (the setting) with watercolor, ink, or water and markers. Students need three backgrounds; for the beginning, the middle and the end of the story.
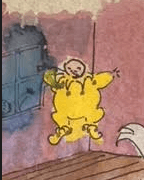
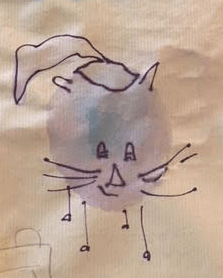
Once dry, we move onto adding details such as characters, magic rings, important owls, and all the individual features that make stories interesting. We use fine tipped markers to highlight shapes, make details, fill out the illustrations.
Finally, we glue the dowels to each end of the scroll. I tend to make the scrolls horizontally, however they can be made vertically, too. Since I usually buy chopsticks to use as dowels, the slightly conical shape lends itself more easily to a horizontal format.
 As the students finish their scrolls I give them plenty of opportunities to practice telling their stories. They can share with friends, volunteers, stuffed animals, or while looking in a mirror. When they feel confident and well prepared – I invite them to share with the class.
One by one, the storytellers share their illustrations and tell the stories. Inviting the principal, other teachers, or parents in to hear these stories can be fun for the adults and exciting for the students. Parents may want to film their student’s presentation.
 Students with low vision or fine motor challenges could make larger scrolls. The normal ‘class size’ scroll is about two feet long and half the height of the rice paper roll . Before I introduce the scrolls to students, I cut the paper into 2 foot lengths, then divide each length in half horizontally. I make enough for everyone in the class, plus do overs, and demonstrations. It would be easy to cut some four foot lengths of paper for students with low vision or fine motor challenges. I would use real wooden dowels for their scrolls.
Bi- or trilingual students could practice telling stories in their first language before trying to tell the story in English. If there are students who share a language/culture then I would encourage them to tell the stories in their shared language to each other. This builds confidence, solidifies the story sequence & elements in their minds, and values their home culture(s). It also supports their English language learning by having the students do some of the ‘heavy lifting’ of the assignment in their first language. Once they know the story well, know when to transition the scroll from one scene to the next, and figure out how to pitch their voice for an audience in their first language, it becomes easier to tell the story in English.
Students who are nonverbal or those with developmental delays could work with a helper. The helper could be a paraprofessional, a volunteer, and/or another student. (The student helper would be able to make their own individual scroll if they wanted in addition to the scroll they make with their classroom friend).
Techno Tips: Depending on the school/district rules, you may want to document the students’ illustrations and oral storytelling, too. While the scrolls are too delicate to put into a class library (I’m open to suggestions on how to make them more durable; can rice paper be laminated?) students would enjoy a book of photocopies with a transcription of the text. Of course, they would also enjoy videos of the scrolls with the audio storytelling, too.
Teaching online: Students could create pictures for each scene in a well-known fairy tale or create illustrations for an original story of their own. This could be done as a ‘homework’ assignment. Students could use online class time to share presentations of their work.
Share This Story, Choose Your Platform!
Download Colorful Collections:
A Mindful Exploration of Proper Fractions
Help your students make sense of fractions.
I started teaching in 1987, which means I’ve collected many tips and tricks along the way. In this ebook, I share concepts, strategies, and classroom materials to help you make math sticky.
Along with this useful ebook, you will receive weekly emails from StickyMath@UnCommon-Core.com. I send information like: teacher tips, educational ideas, book reviews, curated lists, reviews of educational sites, and free first drafts of products that I’m creating for my TPT store. That way, you get helpful ideas and free stuff, while I get some feedback before I finalize products and put them up for sale.
I value your privacy. I will never sell your information. You may unsubscribe at any time.
All the best!
Isabelle
Isabelle Hoag M. Ed.
